Help Center
eSIM Support and All Frequently Asked Questions
How can I install an eSIM plan manually?
< 1 min read
The most recommended installation method is scanning the QR code. However, if you experience issues scanning the QR code, you may enter details manually.
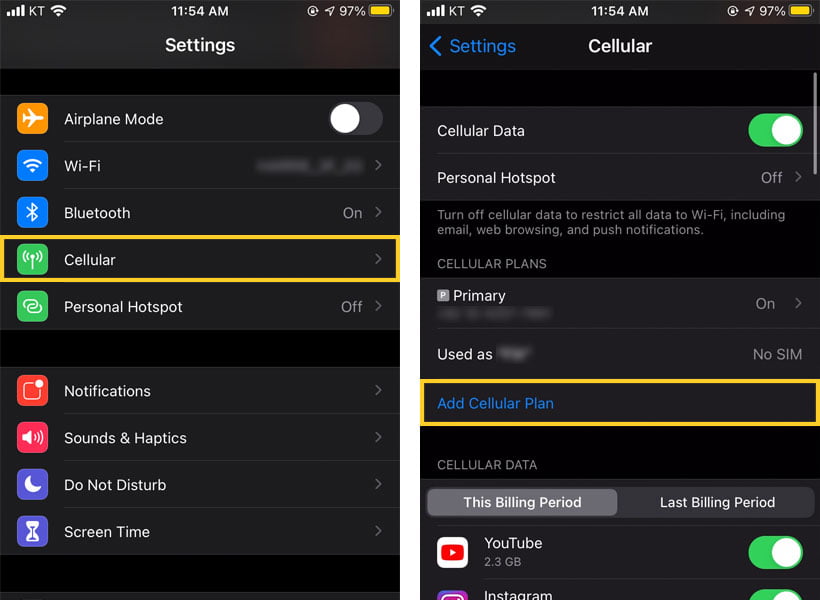
For iOS:
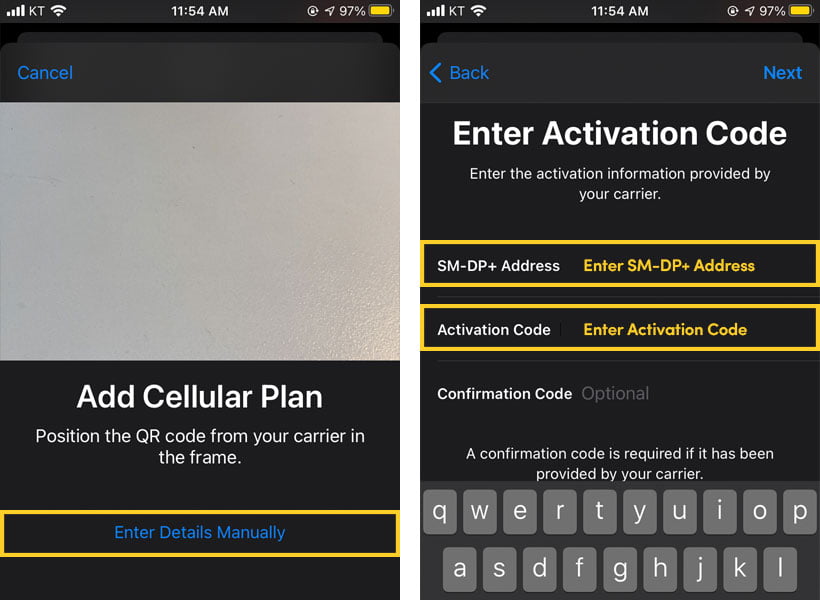
1. Go to [Settings] – [Cellular] – [Add Cellular Plan] – [Enter Details Manually]
2. Enter ’SM-DP+ Address’ and ’Activation Code’ information provided in the email you received after purchase.
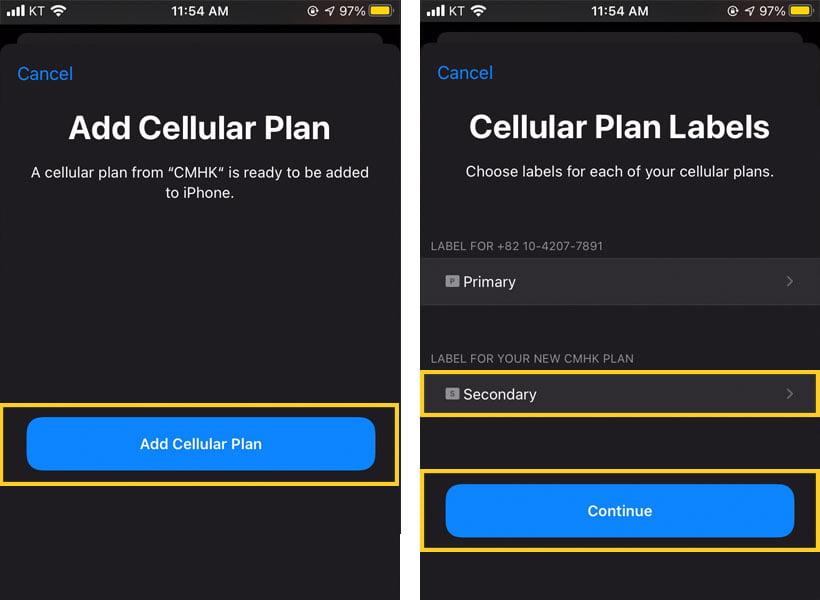
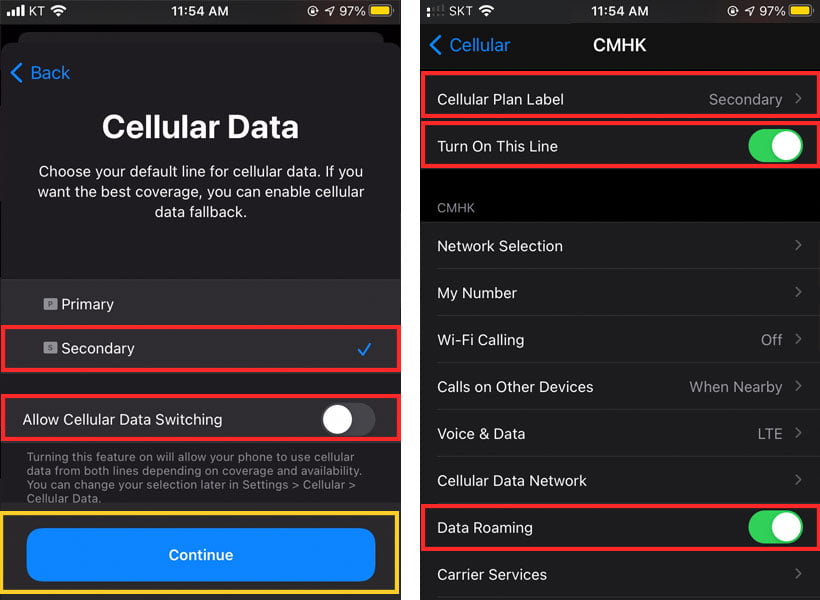
3. Your eSIM plan will be activated automatically as you set the details.
For Android:
1. Go to [Settings] – [SIM Card Manager] – [Add a Mobile Plan]
2. Go to [Scan Carrier QR code] – Tap [Enter Code] instead
3. Enter the ‘SM-DP+ Address’ and ‘Activation Code’ information provided in the email you received after purchase.
4. Tap [Connect] – [Add and use it now]
5. Your eSIM plan will be activated automatically as you set the details.
Powered by BetterDocs